Animation Week 3

screen shot 2019-01-26 at 12.58.07 pm

Students started creating their bouncing ball animations in Photoshop. Probably wondering why Photoshop (PS) instead of jumping into Animate or another program. I decided that even though it is limited for animation software you can teach students to animate in 3 ways. The big plus was that I wanted students to feel like they had a frame of reference for when we do switch over to other software. I’ve found that once we start post-production students may struggle with it. Also I think I’ve gotten better a teaching it. That probably helps as well.

Working in a PC lab there is no iMovie. My students tend to lean towards apple products. Nothing wrong with that I’m all Mac at home. iMovie is very easy to use, but has limited features. Adobe Premiere is more robust and you can do so much more with the editing. I prefer it. Then when you want to switch to After Effects I think it helps starting with PS.

Students had to animate a bouncing ball based off of Preston Blair’s Animated Ball sequence. That is all over online. A dribbling ball, and then a ball animated anyway they like.  Tuesday students will start learning post-production in Premiere. I think it will take a week. Well worth taking the time to learn and then students will feel more confident using the software.  As far as audio is concerned I’m just going to teach them how to find audio. Later we can learn foley work. I ordered a Blue Yeti for myself. Probably use Audacity. We have audition, but the more I read reviews most Youtubers are using Audacity. It is good enough for Marques Brownlee. Love his tech reviews.

I also think there will always be some students that prefer animating over postproduction. I’m one of them. It isn’t my favorite thing worry about audio/titles/transition etc. I’m pretty tired from all the drawing that I feel like it was a sprint to get that done. Really is a marathon. I think it will be interesting to see which students excel in areas that I’m weak at. Then they can teach me a thing or two.

Astropad App

jmmwefasknpfbz4szpkyke-480-80

I purchased a Wacom Cintiqu Pro 16″ and it doesn’t disappoint. For $1500 it should be great. I love it, but I was doing more research and if you are on a budget for yourself or a classroom I’d suggest looking into the Astropad app. Many public schools have 1-to-1 iPads for their students. The app allows you to mirror on to you computer what you are doing on your iPad.  If you looking into purchasing the screen protectors that I’ve seen that mimic the feel of paper then you may have something that could really save you bucks. I honestly haven’t tried it but if you figure a 2018 iPad starts at $400 and then $100 for the apple pencil. The Astropad app costs $29.99. There is another app I read about called Duet Pro.  Then there is a company called PaperLike for the screen protector costs $29.

I’ve never used the products, but if you have a small budget and you want students to learn animation I really think it is MUCH easier using some type of screen they can draw on. It’s one thing if you are doing illustration. That is just 1 image. Animation requires multiple images and they you have to consider students are learning in more than 2 dimensions.  They have to understand the image height, width, and time.  Then if it is 3D you are looking at understanding height, width, depth, and time.  It saves time if you can just draw on the screen live.

I think the tech is getting more and more affordable. But as they say you pay for what you get. I’m glad that I went with the Wacom instead of another brand. I’ve always used Wacom for my design/illustration work. When working with a budget the above maybe something to consider. If anyone has used those products would love to hear your thoughts. I am thinking about purchasing PaperLike for my own iPad because nothing beats the feel of drawing on paper. I’ll let you know if I purchase it.

Canon imageClass Laser Printer


Here is a review I’m writing for a color laser printer. I purchased a Canon imageClass Laser Jet Printer for the computer lab.41m0fuxq+el

This was a great replacement laser jet color printer for my classroom. The old one was an HP and the colors printed super dark. I’ve been using the Canon and I’d like to get one for myself. I really like how the colors print. They are vibrant and if I could just find some glossy stock that works with a laser printer I think don’t need to worry about using the inkjet printer. If I found a glossy stock for laser jet I will let you all know. If you know of a glossy stock that works with laserjets please comment!

Why I Blog

This blog is for me to document my process and reflect on how my semester is going with my classes. But there are other reasons I’m blogging about my lessons and sharing. I made a big change from elementary PreK-5th grade art to high school last year. I think it always seems like it wasn’t that bad when I started 8 years ago in the teaching field. How the mind forgets. How bad could changing grade levels be? The homeroom teachers at my elementary school were always change? Good grief! I was thinking it would be a simple switch. What I didn’t realize is that I’d spent 8 yrs cultivating a relationship with students, parents, teachers, and administrators. I had a reputation I think as being a good teacher. It isn’t anything you can see or touch, but it is worth gold. My students could  come into my classroom and tell you exactly how things are done and what to expect. I was really consistent. In turn they were great for me, and I could trust them to take care of business.

Why switch? Well I’ve been an illustator and graphic designer full time prior to education. I always really liked using software with my artwork. My personal site Nmillerillustration.com  and NMillerDesign. For me teaching high school means I’m doing more of my own design and illustration work. I’d watch students draw constantly and I wanted to go back to doing that and working. It’s harder in elementary I feel like because there is so much more prep work. Lesson plans are shorter in elementary, but I’d have to cut and make templates to help students of varying abilities, etc. Each of my grade levels I had different lessons. I never repeated unless my students wanted to do the same lesson again.

It takes time to rebuild that at any new school. I struggled last year because when I changed to high school teaching Animation and Game Design pathway I didn’t know any of the students. They came from 2 different high schools. The students didn’t even know each other or me. I think I realized you have to get them used to each other and to you. My classes were very long at 2.5 hrs. With that you teach fewer classes but it was the same group every day. No A/B schedule. I was planning like crazy. I’d never taught animation. I don’t come from industry. I played around with it at home video editing and animation. I have a background in Illustration and Graphic Design. I did a lot of learning on the side. Go figure I was the only person that applied for the job.

Thank goodness for Youtube and Lynda.com.  I also tried Pluralsight. I love youtubers Blender GURU & Born CG. I don’t get anything for recommending them. I used them when I was learning animation/game design. I spent most of the time learning Maya, Blender, and Unity. Maya didn’t work out because the computers couldn’t handle it. They have some great tutorials. I don’t recommend them for the coding part of it. I really think when the instructors cover that they always say “We assume you have an advanced knowledge of coding.” Like who really does? Maybe the people working in Silicon Valley making 6 figures. Little me had only taken HTML class in college. To me I get better the more I did it, but it was really memory and explaining it to a newbie difficult for me. C# is used in Unity and Python for Blender. I watched Microsoft’s video tutorials on C# from Bob Tabor 2 times. My brain hurt!

There were challenges that I didn’t realize that it would come with teaching high school. Student by nature when older they are pretty stoic. There isn’t the same interactions. It is harder to gauge feedback on how I’m doing. I have to do end of year surveys etc. Status checks. It like taking polls during election season. I think I do better for the students that really want to learn how or pursue the type of work I’m teaching. By nature I try and be honest and critique work to give them feedback. I think critiques are invaluable.

I learned very quickly that you really have to look at the work that students create. What they share and if they really like it they will come back and work on it. It’s really hard when many of my students lacked the transportation to and from the school. That bus schedule is KING.

I spent the year reaching out to other educators teaching high school animation and game design. My favorite teacher person in the world Reema Zoumut. That woman is an amazing teacher! I would have loved to have student taught with her. She is someone that gave me hope. She didn’t come from industry, but several of her students have gone on to work with companies like Blizzard. She is a giving teacher that spent hours talking me through and sharing resources. She had WAY more teaching experience than me and was so kind. I feel like I got through that 1st year because of her. She teaches at Bolsa Grande High School in high school. She has tons of free lessons and resources.

Here is her Graphic Design instagram
and Animation instagram.

I also reached out to Brain Ericson. He teaches in Utah animation and game design. He has some free short cut lists and then another site that he sells his video tutorials. I did purchase one of his video tutorials and they are short and quick. He was kind enough to allow me to use them with my students on Blender.

One of my local teacher friends Kimberly Larsen at the Effingham County College and Career Academy. She has been teaching over 15 yrs high school and has a background in graphic design. She shared her classroom management tips for a lab, and some of the lessons that cross over to animation.

I got lucky that talked with other teacher pros that were giving in their knowledge. I think I should try and give some of the information back to other people in the same boat. Trying to create something new like an Animation and Game Design pathway is a lot of work. It was new for Georgia that year. Standards are pretty vague. In the sense they aren’t telling you want software to use. Then you look at cost. There is some great paid industry software like ToonBoom. That would have cost $12,000 for use for 3 yrs. If I recall. I was overwhelmed relearning Adobe Animate and then delving into Premiere and After Effects post-production part of it.

This school year I’m at trying things out at a new school. I’m posting semester 2 lessons for those poor souls that are trying to integrate more digital art into their art program. Georgia added standards for the high school visual arts teacher that astound me. Looks like you have to really be a jack-of-all trades.

Even if you don’t have the same set-up modify, modify and make my lesson fit your needs. You might not have Adobe CC, so how can you use the files to change them for your software. Or lack of. In a computer lab technology can be your friend or worse enemy. When it works its great, and when it doesn’t well we all have to try and have patience.

Good luck to all my fellow visual arts teachers and getting their curriculums together. I have empathy and I hope some of the info can lighten the load. Best wishes on your school year.


Graphic Design Week 3

studentexample
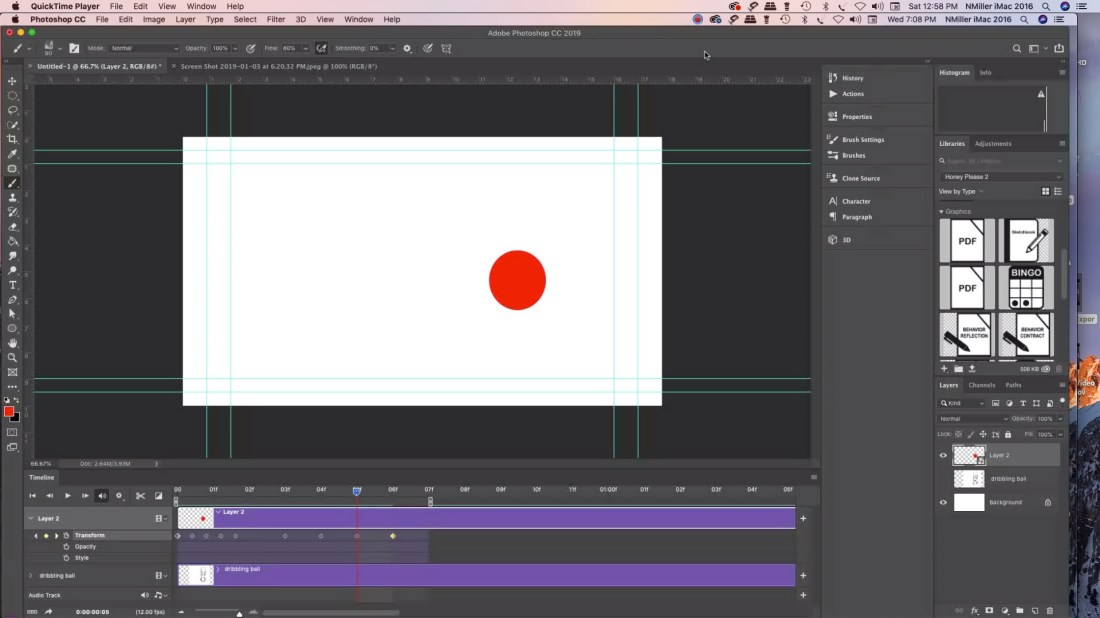
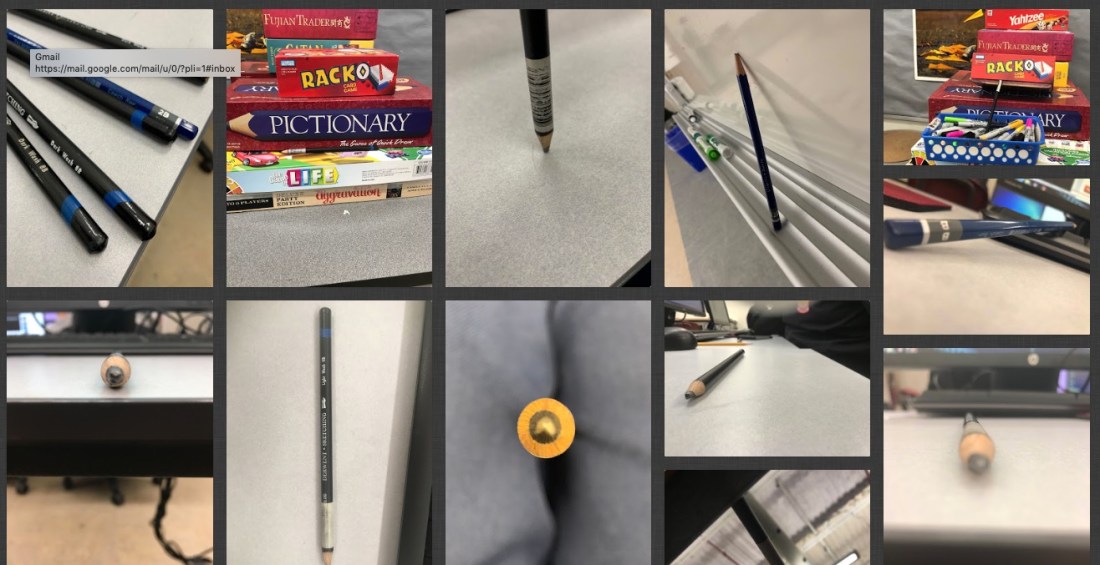
I had my students this week finish their photoshop merge photos project. It’s really for them to get used to using the tools in Photoshop to take several photos and put them into one picture. I have a youtube playlist that you can follow with. PhotoMerge Youtube. I blurred out the student name they had to add type and use the Text Warp in PS.

The photos I got from Pexels.com
The site is free and you don’t need a login to get high res images. I also spoke with another graphics teacher and he has his students use FreeImages.com

Pexels you have to be careful because there could be certain images you don’t want your students to see. FreeImages images are appropriate, but my students had a hard time and would lose connection to the site.

If you want to use the same images that I used with my students.

Toy Bus

Beach Sky

Person on Beach

Blue Barn

Students turned in their work via Microsoft Teams. Found out there is a 50 MB size limit. I had them re-save as a JPG and upload their images. We also started a weekly back up files on their OneDrive.  I think there isn’t a file limit since the school signed up for the accounts but we will see. Google Drive for personal use has a 15GB limit if you don’t have it for education.

We learned about Edward Weston Photographer. We took still life photos of fake eggs and silverware. I’m hoping to share some student examples once we color correct them.

Graphic Design Photo Wk 2 (2019)

broadwayboogiewoogiesmall

It seemed like a very busy week for students. Lots of events going on. I had decided to just teach them simple basics of using Photoshop CC 2018. May of my students are familiar with it. To explain there was a previous teacher teaching graphic design/photo, so some had take the class. I get some students more familiar with it. Or if they have used free apps like GIMP or Pixlr  Photoshop will seem easier to pick up. I have a pretest that I gave a couple to see if they can composite several photos together. If they can they are exempt from this project and they can create an independent project to work on.

Reviewed using Microsoft Teams and then started recreating a piece of artwork. I decided to do Piet Mondrian Broadway Boogie Woogie. In the past I’ve used Van Gogh Starry Night or a Kandinsky. I cut a section of it and provided the file to the students to open in Photoshop.

We go over selecting using the Marquee, brush, eyedropper, shape tool for vectors, and swatches and layers panel. How to navigate with in the document. Change brush sizes.

My new catch phrase is “You can effect it when you select it!”  

I also make them use a specific workspace. Currently using the Graphics & Web workspace. I make them restore all of tools in the tool bar.

Youtube How to change Photoshop CC 2018 Workspace
Youtube How to change Photoshop CC 2018 Tools


Animation wk 1 & 2 (2019)

We worked on the beginner bouncing ball animation lesson. I had students use my bouncing ball worksheet as an introduction to the project. They used index cards and a bull clip to make a flip book. They had 17 frames for a ball moving across, 12 for a dribbling ball, and then 20 for an animation of a ball of their choice.

Here is the video link to my Student Example.

Next week we are going to take their bouncing all and then turn it into an animation in photoshop. They also recreated Steamboat Willie in Photoshop CC 2018.

Students learned how to use the paint bucket tool, brush, marquee tool, eraser, eye dropper, shape tool, workspaces, and restore tool bar, swatches panel, and layers panel.

screen shot 2019-01-19 at 9.37.35 pm

At the end of the week we did a drawing exercise. I have them draw circles then we did a step-by-step drawing of Mickey. I also had them watch a video from PBS American Experience Walt Disney. There is part 1 and part 2. We watched 30 min of it.

In my post for week 1 for Graphic Design we did the same thing getting their student email account set up and their email signature.  Then we went over Microsoft Teams, and One Drive. I call that housekeeping. You have to learn it in order to see/submit their assignments. Microsoft Teams acts as my LMS. I made the Microsoft Teams for Edu playlist on Youtube because I didn’t see much online. Of course every school is different. In my previous teaching jobs we used Google for Edu.


Graphic Design/Photo week 1

The Black Square Problem Student Examples.

screen shot 2019-01-19 at 8.37.28 pm

screen shot 2019-01-19 at 8.38.06 pm

I did this lesson with my high school students the first full week of graphic design/photo class. Computers were not all working and needed a lesson that students could do off the computers. I think it got them thinking about composition more. I think they made some better photos because of it.

screen shot 2019-01-19 at 8.31.49 pmscreen shot 2019-01-19 at 8.31.39 pm

We also took photos of a pencil. How can you make a pencil look more interesting. Varying the composition and placement of it. That was towards the end of the week with the black square problem. I used Padlet to post the photos. You get 3 boards for free.

I also do the pencil photos because students are learning how to use Microsoft Teams. We are a Microsoft 365 school. It has similar features as Google for Edu. I’m getting used to it. I got the students to login to the student emails accounts. Create an email signature. Then I showed them how to access the Team I added them to. We don’t have cameras for the students they use their cell phones. They had to download the OneDrive App. Then we would upload their photos to the cloud storage. Then they downloaded them to their desktop. I’m disappointed the Microsoft Teams App doesn’t allow student to just attach the photo to their assignment from the phones. At this time you can do that using a desktop and a tablet. Worked on my iPad but not on their phones. Microsoft please change this! It’s practice. We switched to 365 at the beginning of the year. Most of my students didn’t know they had a student email account. That took a day. My classes are 44 min long.  I make them do 2 practice turn in so it helps to cut down on questions.

I have a free downloadable PDF from my TPT store you are welcome to try with this lesson. Students sketch out their ideas for playful, order, bold, and tension.

Link to Black Square Problem PDF

Then I had them measure a 10 x 10 in square. The smaller white squares are 4.5 x 4.5 in squares. Then just cut and glue down to match their best sketches.

You could also consider doing this in  Photoshop by opening the PDF file or Adobe Illustrator for a digital version and print out.

I can’t take credit for it I got the idea from a university website. I have no recall what school it was from. If you google search black square problem you will see tons of solutions.


Printable Thank You Cards

screen shot 2019-01-06 at 10.39.12 am

I got so much help from family and friends this year. I really appreciate it. I get so busy or caught with life I forget how grateful I should feel about all the help I’ve gotten. I decided to make some printable Thank you cards. The printable cards are free for anyone that just needs to say Thank You to someone. I always run out of Thank You cards during this time of year and I was teaching myself how to create Adobe Illustrator brushes. I’m getting better. Here is a to a year of more gratitude and empathy.  4 different color combos. I also tried using Coral Color. That is supposed to be a trending color.  Link to download below as a PDF.

notecardsnew2019


3 Tips for Lab Classroom Management

Screen Shot 2019-01-05 at 10.29.04 AM.jpeg

This is  my 2nd year teaching in a computer lab. These are a few tips that have helped me out. There wasn’t as much online about this.

  1. Make sure to label all the computers with a number or a letter. I got this from a teacher friend of mine. Klarson Blog   Why do this? Well it really helps when you don’t know the students very well and you can tell them sit at #9 and not offend anyone because you can’t remember their name. As I get older harder to remember names. I also do assigned seating and that helps to remember who is sitting at which computer. Also when you have to contact your IT dept they will know which computer is having issues.  Here is an image of my current seating chart. There are 8 classes per day (A-H) and then I have 18 computers in the lab. Then I put the student’s name under the correct period and the computer #.screen shot 2019-01-05 at 11.12.55 am
  2. Make students give you an ID for when they check things out. I had a hard time remember who had the head phones or who has a wacom tablet out. Then I started taking the student’s ID while they are using it. The two high schools I’ve taught at require students to carry a student ID.
  3. Slowing down. I used to try and rush starting things, and realized if things aren’t working in the lab technology wise. Just take it slower. I’m having students do hands on projects. Spend more time talking and critiquing till IT has time to come in and fix the issues. Helps vary things up a little. Be patient.

That’s it for today. I’m going to try and blog once a week about what I’m having students work or any other tech tips.